Getting Started
This guide's purpose is to get you started with Icetea blockchain programming. After 30 minutes, you'll know:
- How to author a simple smart contract
- How to build, deploy, and interact with smart contracts
Before you begin
Skill requirements
- Basic understanding of JavaScript
- Knowledge of how blockchain works and experience in coding smart contracts for other blockchains are useful but not required.
Tools
We will use some available online tools.
- Icetea Studio (https://studio.icetea.io) (opens new window)
- CodePen (https://codepen.io) (opens new window)
Later, when developing more complex dApps, more advanced tools will be introduced.
Create the first smart contract
What is a "smart contract"?
Ethereum infamously popularized the term "smart contract". It is better to ignore the meaning of the word "contract" and think of it as a service, either stateful or stateless, hosted on the blockchain. We will need to write the contract source code, compile it, then deploy it to the blockchain. After deployment, clients could send messages and exchange data with the contract.
What contract will we create?
In this guide, we will create a contract named SimpleStore. Any user can set arbitrary values to the contract. However, it stores the last value only. Setting a new value overwrites the current one. Users can query for the contract's current value.
We will also make a simple web page to let users interact with the contract.

Start with an empty contract
We'll write the first smart contract in JavaScript. Let's head to Icetea Studio (opens new window) and create an "Empty JavaScript Smart Contract".
Click on the mycontract.djs file. It should look like this.
@contract class MyContract {

}
It is just a plain and ordinary JavaScript (ES6) class. The @contract decorator is there simply to indicate that this is a smart contract.
First, rename the the class to SimpleStore and add a field named value.
@contract class SimpleStore {
  value = 0
}
0 is the initial value. If you don't set it, it defaults to undefined. The code snippet above uses class instance field syntax (opens new window) which is an ES2019 proposal. Icetea supports most of the recent ES proposals out of the box, so you can utilize modern JavaScript confidently without the need of transpiling with tools like Babel.
Specify contract state
There is one thing to note. Although value is a contract field, its value may not persist between external calls (that is, calls from the client or other contracts). The reason is that, due to memory restriction, the blockchain runtime might choose to serialize some of the contract instances to disk and load them back later. During this process, regular fields' values are discarded. To keep a field's value, you need to mark it with @state.
@contract class SimpleStore {
  @state value: number = 0
}
Now value's value will persist between external calls. We can say it is part of the contract's persistent state or just state for short.
NOTE
Not every JavaScript type can be marked as @state. Currently, only values of types such as number, string, boolean, plain object, or array of those types can be serialized.
Access to contract state
Next, let's add getter and setter for value.
@contract class SimpleStore {
  @state value: number = 0
  getValue() {
    return this.value.value()
  }
  setValue(value) {
    this.value.value(value)
  }
}
The contract now can be built successfully. However, none of its methods is visible to external callers (in other words, they are internal methods). To make a method externally accessible, you need to mark it with one of the following state access decorators.
| Decorator | Meaning |
|---|---|
| @transaction | Indicate that this method updates the contract state. |
| @view | This method reads (i.e. view) contract state, but it won't update. |
| @pure | This method does not access the contract state (neither read nor update). This decorator is often applied to utility functions. |
| @payable | Same as @transaction with one addition: user can attach some amount of asset when calling the method. If you don't understand what that means, just ignore it for now, we'll come back later. |
NOTE
@transaction and @payable methods are resource-intensive. Callers must send a transaction to invoke this kind of method. Transactions require consensus on the blockchain network and thus cost some fees. Therefore, never use these decorators if the method does not change state.
@pure methods are light-weight and should always be used if state access is not required.
In our example, getValue reads contract state (i.e. value) while setValue updates it. So let's add the corresponding decorators.
@contract class SimpleStore {
  @state value: number = 0
  @view getValue() {
    return this.value.value()
  }
  @transaction setValue(value) {
    this.value.value(value)
  }
}
You can also remove getValue method and make value externally assessible by marking it with @view.
@contract class SimpleStore {
  @view @state value: number = 0
  @transaction setValue(value) {
    this.value.value(value)
  }
}
NOTE
The only valid state access decorator for fields is @view. Therefore, you cannot mark value as @transaction and remove setValue method.
That's it. Next, we'll deploy it to the Icetea testnet for testing.
Deploy and test
Take a look at the Icetea Studio toolbar.

- Build: compile the contract. It will output to
out/mycontract.jsfile upon success. If you change the file content, don't forget to save (Ctrl/Cmd + S) the file before compiling. - Deploy: deploy the compiled contract to Icetea testnet
- Build & Deploy: compile first, then deploy if compiling succeeded
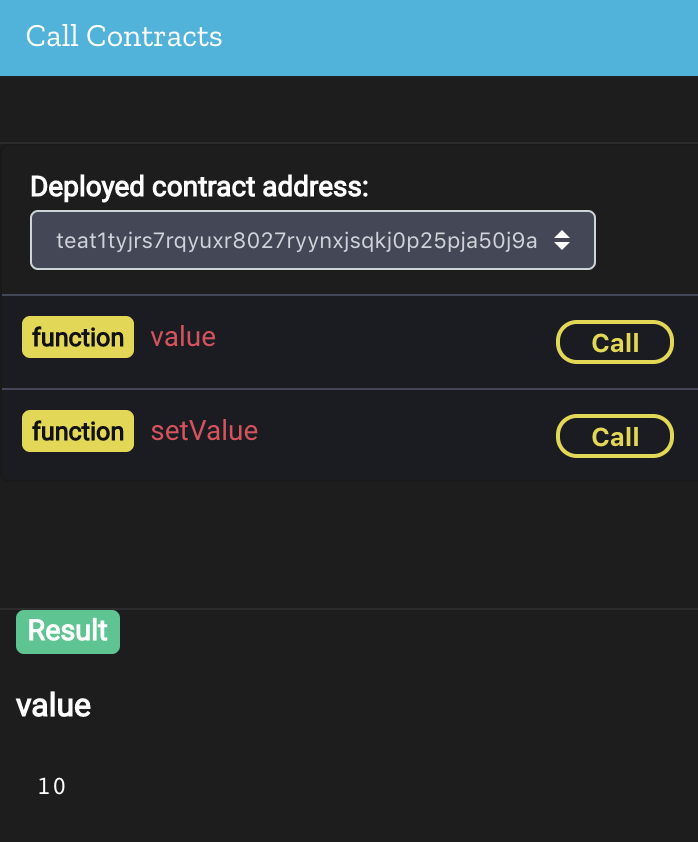
After deployment, you can call the contract's methods using the Call Contracts panel on the right-hand side of the studio.

TIP
Each deployed contract is given an address in form of teat1.... You can call it anytime later if you know the address. Find the address in the Icetea Studio's Output panel after each time you deploy.
Add type checking
Our SimpleStore contract already works. It can store many types of values: number, string, boolean, array, plain object. That's due to the dynamic nature of the JavaScript type system.
But what if you want to store only numbers? Just add some Flow (opens new window)-style type annotations.
@contract class SimpleStore {
  @view @state value: number = 0
  @transaction setValue(value: number) {
    this.value.value(value)
  }
}
Because they are valid Flow type annotations, you can use Flow tool (opens new window) for static type checking if you wish to. Besides, Icetea provides some basic runtime type checking. Try deploying the above contract and call setValue, passing a string to see what happens!
NOTE
Icetea does not perform runtime type check for nested objects. This is done intentionally for the sake of simplicity and performance. If you want to perform complex runtime type checking, no need to worry. Icetea allows your contract to access robust type checking and input validation packages like @hapi/joi , ajv , validator to get the job done.
Validate input
Now, let's add one more requirement: our SimpleStore shall accept only non-negative integer. To do this, simply include some code for input validation.
@contract class SimpleStore {
  @view @state value: number = 0
  @transaction setValue(value: number) {
    if (value < 0 || !Number.isInteger(value)) {
      throw new Error('Value must be a non-negative integer.')
    }
    this.value.value(value)
  }
}
As you can see, to inform the caller about an error, just throw it. This will stop processing immediately and undo all state changes.
To try out how to use external package, let's rewrite the validation logic with @hapi/joi (opens new window).
// You can require Node package, like this
const Joi = require('@hapi/joi')

@contract class SimpleStore {
  @view @state value: number = 0
  @transaction setValue(newValue: number) {
    const { value, error } = Joi.validate(
      newValue, // value to validate
      Joi.number().integer().min(0) // schema
    )
    if (error) {
      throw error
    }
    this.value.value(value)
  }
}
The validation logic of this contract is very simple and no need to use @hapi/joi - it is here just because we want to demo how it works. Check out @hapi/joi documentation (opens new window) if your contract requires complex validation.
NOTE
If you want to use assertion to test invariants, you can require('assert') to use Node's 'assert' core module.
Use utilities to simplify code
The use of Joi.validate and throw new Error above is still not elegant enough. Let's try using the special ; package to simplify it a bit.
const Joi = require('@hapi/joi')
const { validate } = require(';')
@contract class SimpleStore {
  @view @state value: number = 0
  @transaction setValue(value: number) {
    this.value.value(validate(
      value, // value to validate
      Joi.number().integer().min(0) // schema
    ))
  }
}
The ; package's validate function will throw if it encounters errors, so we don't need to throw manually. It will return the sanitized value on success.
TIP
The magic ; module is an alias to the @iceteachain/utils/utils package. It also exports some other handy functions.
revert: stop processing and undo all state changes.revert(message)is equivalent tothrow new Error(message)expect: revert the transaction if the specified condition is not met. It is similar to Solidity'srequirefunction.toMicroUnit/toStandardUnit: convert a currency back and forth between the standard unit (which is user-friendly) and micro unit (which is used internally by Icetea to store balance, fees, etc.)
1 standard unit = 106 micro unit
Voilà! Try building and deploying the contract and play around with it a bit.
Access to blockchain data
The additional requirement
Our SimpleStore works just fine, but let's imagine this: the client requests one additional feature. They want to be informed each time someone changes SimpleStore's value. These are the details they want to know:
- Who changes it
- What is the old value
- What is the new value
How do we do that with Icetea blockchain?
Interact with the runtime environment
To obtain the necessary data for the new feature, the contract needs to interact with the runtime environment. To be specific, it needs to:
- Query the blockchain for the address of the account that made the transaction
- Request the runtime to emit an event each time someone changes the value
There are 3 categories of data and actions a contract can interact with the runtime environment.
Contract data & actions
address: the address of the current contractbalance: the balance of the current contractdeployedBy: the address of the account that deployed this contracttransfer(to, amount): transfer an asset value from this contract to other accountsemitEvent(name, data): emit an event associated with this contract
To access contract data, use this. For example:
@contract class RichMan {
  @transaction donate(receiver: string) {
    const amount = this.balance
    // donate entire balance
    this.transfer(receiver, amount)
    // emit an event about this
    this.emitEvent('Donate', { receiver, amount })
  }
}
Blockchain data
msg: data about the current call, likesender,signers,value(amount of asset being transferred), etc.block: data about the current block, likeheight,hash, andtimestamp(in milliseconds).
These blockchain data are made global, so you can access them directly. For example:
@contract
class RichMan {
  @transaction
  test() {
    // Access to block data
    const blockTime = new Date(block.timestamp)
    // Access to message data
    const she = msg.sender
    const methodName = msg.name // this should equal 'test'
    return `${she} calls ${methodName} at ${blockTime}.`
  }

  @transaction
  donate(receiver: string) {
    // Only contract deployer can perform donation
    if (msg.sender === this.deployedBy) {
      // donate entire balance
      this.transfer(receiver, this.balance)
    }
  }
}
NOTE
Only trust the value of msg if it is a transaction (i.e. it is inside a @transaction or @payable method). With @view and @pure methods, a caller can set msg.sender to any value he/she wishes to because there is no need to sign (i.e. attach a digital signature to) the message.
Runtime functions
balanceOf(address): get the balance of other accountloadContract(address): load another contract to call its methodsrequire(package): load a Node package
These runtime functions are also made global.
const { expect } = require(';')
@contract class RichMan {
  @transaction donate(receiver: string) {
    // ensure the receiver has balance of zero
    expect(!balanceOf(receiver), 'Donate to zero-balance account only.')

    // donate entire balance
    this.transfer(receiver, this.balance)
  }
}
Details about these data and functions are available in the Reference section. For now, let's come back to the SimpleStore's newly requested feature.
The complete contract
With all the knowledge we have learned together so far, let's finish our contract.
const Joi = require('@hapi/joi')
const { validate } = require(';')

@contract
class SimpleStore {

  @view @state value: number = 0

  @transaction setValue(value: number) {
    // save old value
    const oldValue = this.value

    // validate and sanitize input
    this.value.value(validate(
      value, // value to validate
      Joi.number().integer().min(0) // schema
    ))

    // emit event
    this.emitEvent('ValueSet', {
      by: msg.sender,
      oldValue: oldValue,
      newValue: this.value
    })

    // return the old value
    return oldValue
  }
}
That's it. Now go playing with it. Here is the complete version on Icetea Studio (opens new window).
Programmatically call contracts
In this step, we will learn how to programmatically interact with the SimpleStore contract we created during the last step.
Any Icetea node may choose to expose an RPC interface so that clients can query for blockchain data and interact with contracts. However, working with that RPC directly is a little cumbersome, so we will make use of the @iceteachain/web3 (opens new window) library. It is a handy wrapper around the Icetea node' RPC.
Setup @iceteachain/web3
To start, let's create a new pen on codepen.io (opens new window). First, add link to @iceteachain/web3 to the beginning of your HTML.
<script src="https://cdn.jsdelivr.net/npm/@iceteachain/[email protected]/dist/browser.min.js"></script>
Then, craft a simple UI.
<p>Current value: <span id=‘value’></span></p>
<p><input id=‘newValue’ placeholder=‘new value’>
<button id=‘setValue’>setValue</button></p>
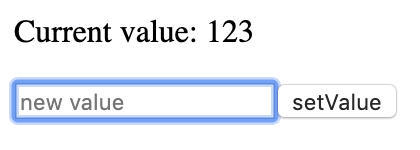
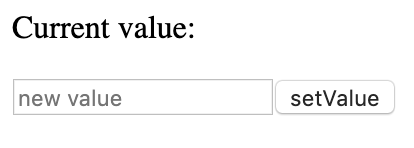
It should look something like this.

Switch to JS editor and add some code to initialize an IceteaWeb3 instance.
// wrap around an Icetea node' RPC
const tweb3 = new icetea.IceteaWeb3('wss://rpc.icetea.io/websocket')

// create a new random account, needed when calling setValue
tweb3.wallet.createAccount()

// NOTE: replace the contract address with your actual address
const contract = tweb3.contract('teat1d3vmdvpd4mzgreqz4jm8nq2qj8teemuy0xe0gu')
DO I NEED AN ACCOUNT?
You don't need to createAccount when calling @view and @pure methods. The account is required only to sign transactions. In our example, we'll need to call setValue which is a @transaction, so we need to create one. You can also use tweb3.importAccount to import an existing account.
Add a helper function to 'boost productivity' 😄
// A helper function
function byId(id) {
	return document.getElementById(id)
}
Call contract methods
On page load, we need to query SimpleStore for its current value and display it onscreen. To do this, let's add a call to the contract's value (it is a contract's field, but we'll need to 'call' the fields as if they are methods).
How do you call a contract method? First, obtain a reference to it, then invoke either callPure, call, or send depending on whether it is a @pure, @view, or @transaction method, respectively.
// do at page load to display current value
contract.methods.value().call().then(function(value) {
	byId('value').textContent = value
})
Next, register an event handler for setValue button.
byId('setValue').addEventListener('click', function() {
  const newValue = parseInt(byId('newValue').value)
  contract.methods.setValue(newValue).sendAsync()
})
There are 3 ways to invoke a contract's @transaction method: sendAsync, sendSync, and sendCommit. We'll explain the difference shortly. Before that, look carefully: we pass the parameter newValue to setValue instead of to sendAsync. This is something you must remember and get familiar with because it is not very intuitive at first.
Now, back to the sendXXX stuff.
sendAsync: send the transaction and return immediately without waiting for any kind of confirmationsendSync: send the transaction and wait until it passes the preliminary check and be accepted as a pending transaction.sendCommit: send the transaction and wait until it is included in the blockchain. Note that the transaction might succeed or fail (e.g. the contract method throws an error), but whatever the result is, the transaction was included permanently in the blockchain.
Back to our example, we want to display the new value after each committed change, so we should switch from sendAsync to sendCommit.
byId('setValue').addEventListener('click', function() {
  const newValue = parseInt(byId('newValue').value)
  contract.methods.setValue(newValue).sendCommit().then(function() {
    byId('value').textContent = newValue
  })
})
EDIT ON CODEPEN (opens new window)
It works great. But there's one shortcoming: if Alice updates the value, the updated value won't show on Bob's screen. Bob must reload the web page to get the updated value. Is there a way to help Bob? He does not like to reload the screen now and then that much 😦
Think about this a little bit...
Yes! Events to the rescue! Remember that our contract emits an event called ValueSet, doesn't it? Subscribe to an event is straightforward, look at this.
const filter = {}
contract.events.ValueSet(filter, function(error, data) {
  if (error) {
    console.error(error)
    byId('value').textContent = String(error)
  } else {
    byId('value').textContent = data.eventData.newValue
  }
})
Just like we access a contract's method with contract.methods.someMethodName, we subscribe to an event with contract.events.SomeEventName. Pass a filter object (ignore it for now) and a callback function. The callback will get called each time the contract emits an event of that type.
NOTE
Events emit before the time of subscription will not trigger the callback.
If you've gone this far, well-done! You are an Icetea Blockchain Developer now 😄. Let's take a look at what we've done.
In the next chapters, we'll learn how to make more complex dApps and chatbots.
← Roadmap
